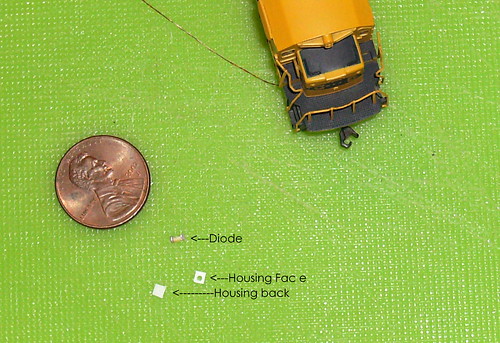
My scratch built kit consists of three parts diode, wire, and housing.
1.The diode came from the lighted keypad on a Samsung cell phone.
2.Wiring was donated from an old can motor that was disassembled.
3.Housing for the ditch lights was created using sheet styrene.
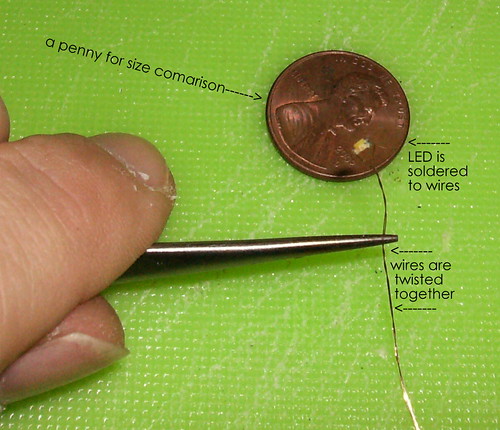
I soldered the wires to the diode. Twisted the wires together and tested the connections. It works (the motor wires have a very thin layer of insulator) They run on 3V DC so I tested them using them two AA batteries wired in series.
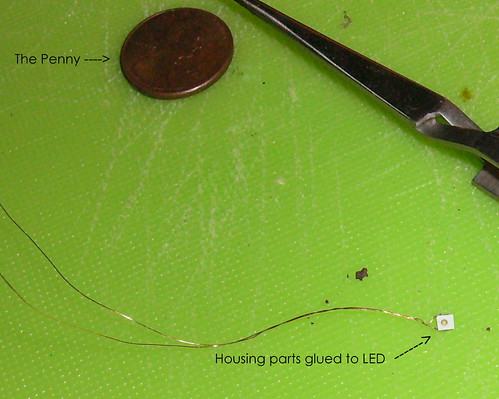
After testing the LED’s I glued (using Cyanoacrylate) the front and back housing pieces to the diode. Due to the thickness of the LED there is a gap between the styrene sheets so i filled that with body filler putty, taking care not to accidentally fill in the hole in the face drilled for the light to escape. I sanded the putty down flat and ended up with a little box with a hole in the front.
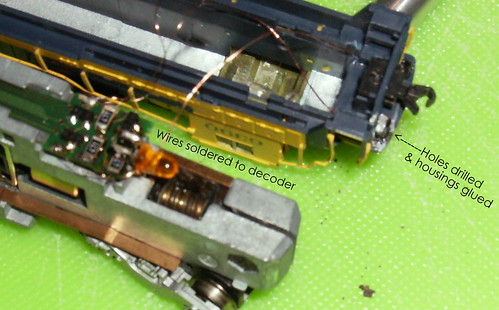
Then I drilled holes in the loco shell for the wires to go through and glued the little cubes to the front of the loco. I then identified the anode and cathode ends of the wires and soldered them to the Decoder at the places provided.

After programming the associated cv’s in the decoder. I tested the locomotive and I was pleased with the look. The bonus is when you press the “horn” button the lights pulse back and forth just like a real train. I just wish I had sound.
No comments:
Post a Comment