Thursday, December 31, 2009
N-Scale Ditch Lights
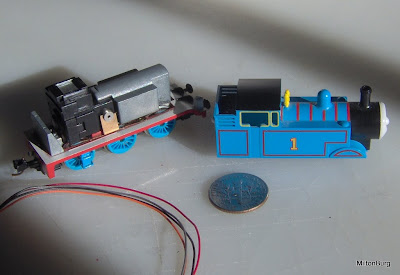
My scratch built kit consists of three parts diode, wire, and housing.
1.The diode came from the lighted keypad on a Samsung cell phone.
2.Wiring was donated from an old can motor that was disassembled.
3.Housing for the ditch lights was created using sheet styrene.
I soldered the wires to the diode. Twisted the wires together and tested the connections. It works (the motor wires have a very thin layer of insulator) They run on 3V DC so I tested them using them two AA batteries wired in series.
After testing the LED’s I glued (using Cyanoacrylate) the front and back housing pieces to the diode. Due to the thickness of the LED there is a gap between the styrene sheets so i filled that with body filler putty, taking care not to accidentally fill in the hole in the face drilled for the light to escape. I sanded the putty down flat and ended up with a little box with a hole in the front.
Then I drilled holes in the loco shell for the wires to go through and glued the little cubes to the front of the loco. I then identified the anode and cathode ends of the wires and soldered them to the Decoder at the places provided.
After programming the associated cv’s in the decoder. I tested the locomotive and I was pleased with the look. The bonus is when you press the “horn” button the lights pulse back and forth just like a real train. I just wish I had sound.
Sunday, December 27, 2009
A new locomotive seen on the branch!
Shortly after Christmas Day a Katy loco was seen delivering an ore car to Miltonburg.
A big thank you to my father for getting me a new Atlas GP-40 in Katy livery and also a big thank you to my grandpa for helping with the cost of the decoder. I went by Angelo Hobbies today and picked up the TCS AMD4 for the little loco. I installed it and it ran fine but it seemed a little too noisy… however it should do.
Saturday, December 19, 2009
A really Small decoder, for a really small engine.
Today I went to Angelo Hobbies today and bought a tiny little TCS Z2 Decoder. It features two light functions but I do not have any resistors small enough yet to install the lights.
As you can see there is not much room for anything much less a decoder.
There is a small place behind the motor where I will put the decoder.
After disassembly I cut the motor contacts and removed the brush covers from the motor.
The rear weight needs to be cut down flat to provide room for the decoder and wires.
Here you can see the Decoder with the light wires wrapped around it and the motor and track wires separated. the motor brush covers are the small metal things towards the top.
Here it is after soldering the brush covers to the motor leads.
Then after soldering the track leads to the wipers I reassembled the loco.
After all the cutting grinding and soldering I think it came out all right it handles nicely on the layout and is a really fun engine to run.
Some rocks and More Super Elevation
From Miltonburg Branch Subdivision |
The curve around the engine terminal got some elevation.
From Miltonburg Branch Subdivision |
Here is how the curve looks loaded. the elevation is slight but it makes a difference.
From Miltonburg Branch Subdivision |
Tuesday, December 15, 2009
Painted and finished fascia, streams, and some more grass.
From Miltonburg Branch Subdivision |
Carola painted the culverts and some of the rocks. Then we put down some grass and planted some trees.
From Miltonburg Branch Subdivision |
We also painted some of the base colors for some of the streams.
From Miltonburg Branch Subdivision |
Friday, December 11, 2009
First of the Fascia and grass. Some paint too.
From Miltonburg Branch Subdivision |
The grass around the industrial lead switches helps to add realism, but I still need to paint the switch stands.
From Miltonburg Branch Subdivision |
Having an artist in the house helps when you need to paint things especially bridge abutments.
From Miltonburg Branch Subdivision |
Saturday, December 5, 2009
A curve reworked, A switch placed and A turntable powered!
From Miltonburg Branch Subdivision |
As you can see from the picture I had to rework the radii of the curves to make the turnout fit in. The radius ended up having to be reduced towards the end of the curve; I was however able to keep enough straightway track between the two curves so operation will not suffer. The turn table got wired into the power buss and its a split ring turntable so I won’t need another auto reverser.
Zach’s little engine (EMD F-9) he got for Christmas last year got a Digitrax DN-121 today. The little bachman engine was a real pain to put a decoder into. I had to mill the frame to make room and isolate the motor with CA and insulating rubber (road bicycle superlight tube material). The rubber made it a little quieter than it had been, I think. I did, while I was at it, put a rear light in it and give it a good cleaning.
From Miltonburg Branch Subdivision |
This brings my “decoder equipped” loco count up to 3.
From Miltonburg Branch Subdivision |
Night time in Miltonburg!
Friday, December 4, 2009
Bridge Abutments and Running Trains
From Miltonburg Branch Subdivision |
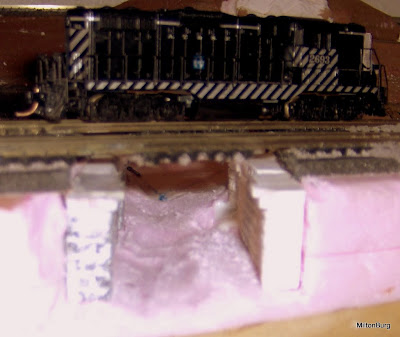
The double track bridge got abutments and the little road bridge was constructed it needs paint but its done.
From Miltonburg Branch Subdivision |
The boys an I got a chance to use the “Jump Throttle” feature on the Zephyr. It was fun and we enjoyed running two engines at once.
From Miltonburg Branch Subdivision |
Insulated Joints help Operation
From Miltonburg Branch Subdivision |
I soldered brass wire from the main line to the spur track and then ballasted over them. This means that no matter how the points are lined the loco still receives power. That creates a prototypical problem “running through switches” because the power is not routed by the points there is no dead spot and the turnout can be “run through” on a trailing point move. I think this is good because it adds to the realism of the model.
Dividing the main into blocks is also a good idea so I’ve started making insulated joints at various locations to separate the layout into four different blocks.
From Miltonburg Branch Subdivision |
This picture is of a insulated joint prior to trimming the styrene to the profile of the rail.
From Miltonburg Branch Subdivision |
This picture shows an insulated joint in the middle of a road crossing.
From Miltonburg Branch Subdivision |
On the industry spur the turnouts have metal frogs so the insulated joints are on the inside rails and they have been wired together to allow good electrical conductivity.
Got the DCC System
But as with any dcc system you need decoder equipped locomotives
This brings up a problem! If you have an older Atlas loco that is not “DCC Ready” then you need to wire a decoder into it…. there is a new solution from TCS that makes this so much easier. The CN-GP split board decoder (pictured above). since I have one of these older Atlas locos, I purchased one. The install went pretty easily, while far from plug and play it was not very difficult. The decoder runs smoother than the other decoder I have in an Atlas “DCC Ready” loco and does so due to the fact that the motor wires are soldered to the brush housings.
While I needed a good control system I also needed an auto reverser. The Digitrax AR-1 was the answer.
This Picture is a view of the wiring junction and Diagram under the front edge of the layout. You can see the AR-1 towards the back. To install the AR-1 I mounted it to the bottom of the layout with four screws and connected it, between the power and the block that I wanted to auto reverse.
The thing works like a charm. The locos move over the crossovers seamlessly without so much as a pause. This thing sure beats wiring DPDT switches and having to manually operate them.
Tuesday, November 24, 2009
Finish the crossings I started before I got called to take the MFWSA to Taylor.
From Miltonburg Branch Subdivision |
The first one across the Main.
From Miltonburg Branch Subdivision |
The second across the industrial spur.
From Miltonburg Branch Subdivision |
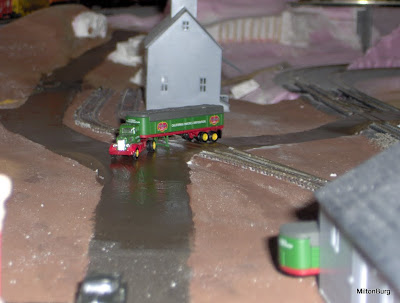
A truck crossing the spur
From Miltonburg Branch Subdivision |
Saturday, November 21, 2009
Base coat of paint and more crossings
From Miltonburg Branch Subdivision |
One of the foam putty crossings goes across the main line at the lower crossover.
From Miltonburg Branch Subdivision |
and the other crosses the industrial lead.
From Miltonburg Branch Subdivision |
A culvert pipe placed for the drainage creek.
From Miltonburg Branch Subdivision |
A little bridge construction is underway.
From Miltonburg Branch Subdivision |
Saturday, November 14, 2009
Lots of Painting and Super Elevation
Carola and I spent time today painting the benchwork/shelves
I forgot to mention that I super elevated the big curve a few days ago.
Friday, November 13, 2009
Ballasting, more track work, placement of rock castings, and road crossings.
This is Carola’s handiwork at Ballasting
The tricky part of using two different sizes of track is connecting them together…
Here I used code 55 in the industry spot and code 80 for the main line.
Placing hydrocal castings on the foam and sealing the edges with foam putty.
Using foam putty for road crossings.
The roadway bridges will be placed in the painted area.